
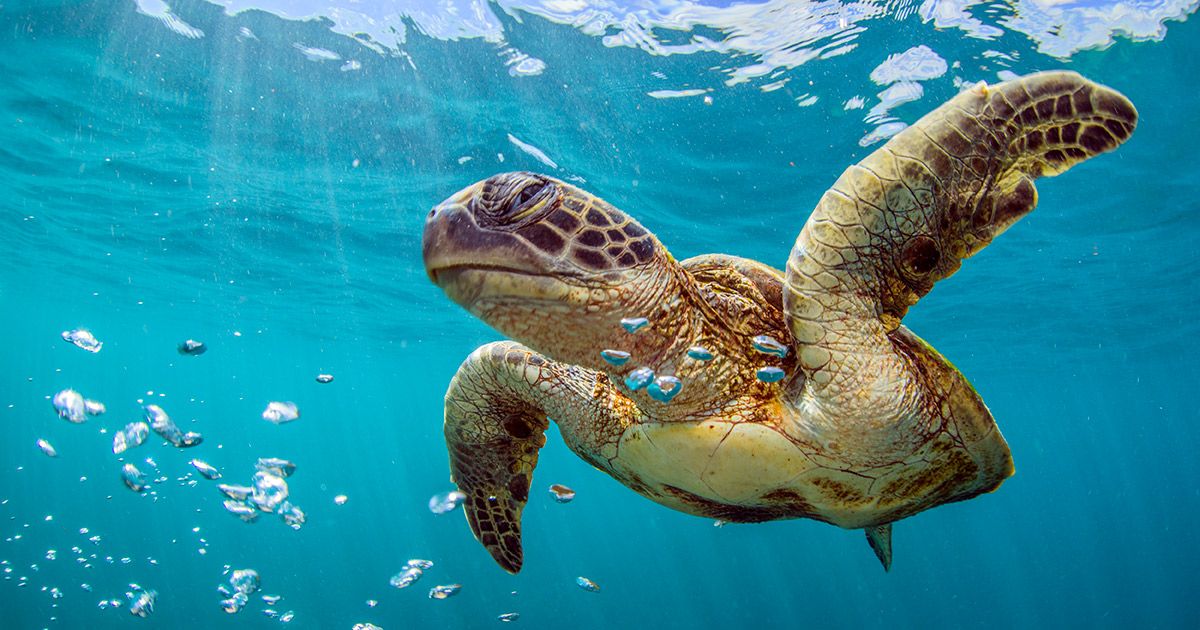
If you’re looking for fun diy pet turtle projects, check out these 10 ideas you can make at home. From homemade basking docks to diy turtle tanks, these projects will keep your pet turtle happy and healthy.
Pet turtles can make great pets, but they require certain things to be happy and healthy. One of these things is a suitable habitat where they can swim, bask, and hide. Luckily, there are many fun and creative ways to make a comfortable home for your turtle.
In this article, we’ll explore 10 diy pet turtle projects that you can easily make at home. From an elevated basking dock to an aquarium filter and more, these projects are perfect for both beginner and experienced pet owners alike. Let’s dive in and see what fun projects we can create for our turtle friends!

Credit: time.com
Creating Proper Turtle Environment
How To Create The Perfect Habitat For Your Turtle
Turtles are wonderful pets that require a comfortable and healthy environment to thrive in. Creating the perfect habitat for your turtle ensures that they live comfortably, are happy, and remain healthy. Here are some key points to keep in mind when setting up your turtle’s habitat.
- The right tank size: Choosing the right size of the tank is vital for your turtle’s comfort. Ensure that the tank is big enough for your turtle to move around comfortably and accommodate any equipment or decorations. A general rule of thumb is to have at least 10 gallons of water per inch of turtle shell length.
- Temperature and lighting: Turtles need the right temperature and lighting to be healthy. Basking areas need to be provided that have temperatures ranging from 90 to 95 degrees fahrenheit. The water temperature should be around 75-78 degrees fahrenheit. Uvb lighting is also essential for their healthy growth and good metabolism.
- Using natural or synthetic components: It’s important to use either natural or synthetic components while creating your turtle’s habitat. If using natural components like rocks and driftwood, make sure that they are safe for your turtle’s health and don’t harbor any harmful bacteria. Synthetic options like artificial plants are also suitable for turtles and minimize the risk of infection.
The Right Tank Size, Temperature, And Lighting For Your Pet Turtle
The size of the tank, the temperature, and lighting are the three most important elements to keep in mind for your turtle’s health.
- Tank size: As mentioned above, the tank should be spacious enough for your turtle to move around comfortably and fit all equipment and decorations. A bigger tank is always better than a small one. For example, a hatchling can start in a 20-gallon tank and eventually move into a 75-gallon tank as they grow.
- Temperature: Turtles are cold-blooded creatures and need to be in an environment that maintains a warm temperature. Keep their basking areas at a temperature ranging from 90-95°f, and the water temperature around 75-78°f.
- Uvb lighting: Turtles require uvb lighting to get vitamin d3, which helps with their metabolism and growth. The basking area should be provided with an appropriate light that emits uvb.
Using Natural Or Synthetic Components To Build A Turtle-Friendly Environment
Creating a turtle-friendly environment means providing a living space that’s safe and healthy for your pet. There are several options to choose from when considering using natural or synthetic components.
- Natural components: Natural rocks, driftwood, and plants are great to use in your turtle’s environment. However, make sure they are safe and bacteria-free, and avoid having sharp edges that could harm your pet.
- Synthetic components: Artificial plants and decorations are risk-free options to add to your turtle’s environment. They eliminate the possibility of harmful toxins or pathogens and are easy to clean and replace.
By creating the perfect habitat for your turtle, you ensure their health and happiness, leading to a long and fulfilling life for your beloved pet.
Diy Turtle Dock
Benefits Of Having A Turtle Dock
A turtle dock is an important piece of equipment for pet turtle owners to have in their aquariums. Not only does it provide a basking area for your turtle, but it also offers several other benefits, such as:
- Helps your turtle regulate its body temperature: Turtles are ectothermic, which means they need to bask under a heat source to regulate their body temperature. A turtle dock provides a perfect spot for them to bask and warm up.
- Prevents shell rot and fungus: When your turtle is constantly in the water, it can develop shell rot and fungus. A turtle dock allows your turtle to climb out of the water and dry off, preventing any shell issues.
- Provides a spot for exercise: Turtles love to climb and bask, and a turtle dock gives them a great spot to do just that. It also encourages them to get some exercise by climbing up and down the ramp.
Materials Required For Making A Turtle Dock
Making a turtle dock can be quite easy and affordable, especially if you have some supplies on hand. Here are some of the materials required to build a simple turtle dock:
- Pvc pipe: 8-10″ long
- Pvc end caps: 2
- Plexiglass or acrylic sheet: 12×12″
- Aquarium silicon sealant: 1 tube
- Screws and screwdriver
- Measuring tape and pencil
Step-By-Step Instructions For Building A Simple Turtle Dock
Building a turtle dock can be done in just a few easy steps. Follow these instructions to create your own dock:
- Cut the pvc pipe into 4 equal pieces of 2-2.5″ each.
- Screw them together to make a square frame.
- Cut the plexiglass or acrylic sheet to fit inside the pvc frame.
- Use the aquarium silicon sealant to seal the plexiglass or acrylic sheet to the pvc frame.
- Let the sealant dry and set the dock in the aquarium.
- Fill the aquarium with water so that the dock is partially submerged.
Tips For Customizing A Turtle Dock According To Your Turtle’S Needs
Every turtle is unique and has its own set of needs. Here are a few tips for customizing your turtle dock:
- Size: The size of the dock should depend on the size of your turtle. A larger turtle will need a larger dock.
- Material: While pvc and plexiglass work well for making a turtle dock, you can also use other materials such as wood or rocks to give your turtle more texture to climb.
- Water level: The water level should be deep enough for your turtle to be able to dive, but shallow enough so that the turtle can climb onto the dock easily.
- Ramp: The ramp should be at a gentle slope so that your turtle can climb on and off easily.
By following these tips and customizing your turtle dock according to your turtle’s needs, you’ll be providing your beloved pet with a comfortable and safe home.
Turtle Basking Platform
Why A Basking Platform Is Essential For Your Pet Turtle
Providing an appropriate basking platform for your pet turtle is essential for its health and wellbeing. Turtles are cold-blooded creatures that rely on external heat sources to regulate their body temperature. A basking platform allows your turtle to bask under a heat lamp or in natural sunlight, essential for warming their body, boosting their immune system, and promoting healthy behavior.
Materials Required For Making A Turtle Basking Platform
Fortunately, you don’t need a lot of fancy materials to make a turtle basking platform. These are the materials you’ll need, readily available at hardware or diy stores:
- Plastic storage container that fits the size of your turtle
- Eye bolts with nuts and washers
- Pvc pipe
- A piece of plywood that fits the container
- Aquarium silicone sealant
- Nylon mesh
- Screening
- Drill with bits
- Saw
Step-By-Step Instructions For Making A Simple Basking Platform
Follow these straightforward instructions to construct a simple yet effective basking platform for your pet turtle:
- Measure and cut two pieces of pvc pipe to fit the length of the container.
- Drill a hole in each end of the pipe and one hole on each side of the container.
- Attach the eye bolts with nuts and washers to the pipe ends, and the container.
- Cut plywood so that it fits the container’s width and place it on top, supported by the pvc pipes.
- Use aquarium silicone sealant to glue the plywood to the pvc pipes.
- Cut a piece of nylon mesh, place it over the plywood and attach screening to secure.
- Drill several holes around the mesh perimeter for safety.
- Place the basking platform in the turtle’s aquarium, making sure it’s secure and sturdy.
How To Keep Your Basking Platform Clean And Hygienic
It’s crucial to keep your basking platform clean and hygienic to prevent the build-up of harmful bacteria. Here are some tips on how to maintain your turtle’s basking platform:
- Remove excess food and feces frequently.
- Wipe the basking platform with a damp cloth and mild detergent as needed.
- Rinse thoroughly with warm water and pat dry with a clean towel.
- Inspect and replace the nylon mesh and screening every six months.
- Clean and disinfect the basking platform with a solution of 10% bleach once a month. Rinse thoroughly and leave to dry before use.
Creating a basking platform is an essential part of owning a pet turtle. This guide provides a straightforward method to construct a simple basking platform and maintain it, ensuring your turtle stays healthy and happy.
Diy Turtle Hidebox
Turtles are fascinating pets that require a lot of love and attention. One of the important things you can do to ensure your turtle’s happiness is to provide them with a safe and comfortable hiding spot. In this section, we’ll walk you through step-by-step instructions for building a diy turtle hidebox for your beloved pet.
Why Your Turtle Needs A Safe Hiding Spot
Turtles are known to be shy creatures, and they need a place to retreat and hide when they feel threatened or scared. In their natural habitats, they typically seek out hiding spots like caves, crevices, and under rocks. Providing your turtle with a hiding spot is essential for their mental and physical health.
Here are some reasons why:
- A hiding spot offers a sense of security to your pet turtle.
- It allows them to regulate their body temperature and rest comfortably.
- Your turtle will feel less stressed and agitated when they have a safe place to retreat.
Materials Required For Making A Turtle Hidebox
Before you get started on building a turtle hidebox, you will need the following materials:
- Plastic or wooden box (big enough to fit your turtle)
- Non-toxic paint or sealant
- Gravel, rocks, or sand
- Moss, coconut coir, or other substrate
- Decorative elements like plants, rocks, or driftwood
Step-By-Step Instructions For Building A Basic Turtle Hidebox
Now that you have gathered all the materials, it’s time to create a diy turtle hidebox. Here are some simple instructions to help you out:
- Begin by cleaning and preparing your plastic or wooden box.
- Apply a non-toxic paint or sealant on the outside of the box.
- After the box is dry, add a layer of gravel, rocks, or sand to the bottom.
- Next, add a layer of substrate such as moss or coconut coir.
- Place decorative elements like plants, rocks, or driftwood inside the box.
- Position the box in your turtle’s habitat, ensuring there is enough room for your pet to climb in and out of the hiding spot.
Tips For Ensuring Your Hidebox Remains Comfortable And Clean
To keep your turtle’s hiding spot comfortable and clean, follow these tips:
- Clean the hidebox regularly as turtles tend to defecate in their hiding spots.
- Use non-toxic cleaning solutions to avoid harming your turtle.
- Replace the substrate and decorative elements periodically.
- Ensure there is enough ventilation inside the box to avoid bacteria growth and mold.
Building a diy turtle hidebox is an easy and cost-effective way to provide your pet with a safe and comfortable place to hide. Follow these simple instructions and tips to create a perfect hidebox for your turtle.
Turtle Feeder
10 Diy Turtle Projects: Fun Ideas For Your Beloved Pet!
Do you own a turtle? If so, you know how much they love to eat! And because turtles are such picky eaters, it can be challenging to feed them the right amount of food at the right time. That’s why building a specialized turtle feeder can be beneficial to both you and your pet.
In this post, we’ll guide you through the benefits of having a turtle feeder, the materials needed to build one, step-by-step instructions, and tips for ensuring your turtle feeder dispenses the right amount of food each time.
Benefits Of Having A Specialized Turtle Feeder
A turtle feeder can provide several benefits for you and your pet. Here are three major advantages:
- Consistency: With a specialized turtle feeder, you’ll be able to feed your pet regularly and at the same time each day. This consistency can help keep your turtle healthy and reduce stress.
- Precision: Turtles need a specific amount of food each day, depending on their size and species. A turtle feeder can dispense the correct amount of food every time and prevent overfeeding or underfeeding.
- Convenience: If you’re busy and don’t always have time to hand-feed your turtle, a turtle feeder can be a lifesaver. It allows you to automate the feeding process, so you can focus on other tasks.
Materials Required For Making A Turtle Feeder
Building a turtle feeder is relatively easy and requires just a few materials. Here’s a list of what you’ll need:
- A plastic container: Choose one that’s large enough to hold a few days’ worth of food but small enough to fit in your turtle’s enclosure.
- A pvc pipe: You can find this at any hardware store. Make sure it’s wide enough to dispense your turtle’s food and tall enough to reach the top of the container.
- A drill: You’ll need to drill holes in the plastic container and the pvc pipe to make the feeder.
- Silicone sealant: This will seal the pvc pipe in place and prevent any leaks.
- Turtle food: Of course, you’ll need food to put in the feeder!
Step-By-Step Instructions For Building A Simple Turtle Feeder
Now that you have your materials, it’s time to build your turtle feeder. Here’s a step-by-step guide:
- Using your drill, make a hole in the bottom of the plastic container. Make sure it’s big enough for the pvc pipe to fit through.
- Drill several small holes around the base of the container. This is where the food will come out.
- Cut the pvc pipe to the desired length. It should be tall enough to reach the top of the container but not too tall that it falls over.
- Apply silicone sealant around the bottom of the pvc pipe.
- Carefully insert the pvc pipe through the hole in the container.
- Add turtle food to the container and screw the lid on tightly.
- Place the feeder in your turtle’s enclosure and adjust the height of the pvc pipe as needed.
Tips For Ensuring Your Turtle Feeder Can Dispense The Right Amount Of Food
Here are some helpful tips to ensure your turtle feeder works correctly:
- Test the feeder before leaving it unattended. Make sure it dispenses the right amount of food and isn’t leaking.
- Check the feeder’s height regularly to ensure it’s at the right level for your turtle.
- Use a high-quality turtle food that won’t clog the feeder or get stuck in the pvc pipe.
- Clean the feeder regularly to prevent bacteria buildup.
Now that you’ve built your own turtle feeder, you can enjoy the benefits of having a consistent, precise, and convenient feeding schedule for your pet. Give it a try, and see how happy and healthy your turtle can be!
Turtle Dangling Toys
Keeping your pet turtle engaged and entertained is essential for their overall well-being. One effective way to do this is by giving them toys to play with. Turtle dangling toys are a fun and easy diy project that you can make yourself using simple materials.
Here’s why your pet turtle needs toys to stay engaged, a list of the materials needed and a step-by-step guide to making a turtle dangling toy.
Why Pet Turtles Need Toys To Stay Engaged
- Toys provide mental and physical stimulation for your turtle, preventing them from becoming bored and inactive.
- Playing with toys can help turtles develop problem-solving and decision-making skills, as well as increase their spatial awareness.
- Toys can also encourage exercise and movement, helping to keep your pet healthy.
Materials Needed For Making Fun Turtle Toys
- A sturdy piece of string or shoelace.
- Some materials for decorating the toy such as beads, shells, and buttons.
- A plastic or rubber ball just a little bit bigger than the turtle’s head.
Step-By-Step Instructions For Crafting A Turtle Dangling Toy
- Cut a long piece of string or a shoelace.
- Thread some beads, shells or buttons onto the string, leaving some space at each end.
- Tie the string around the ball and secure it tightly.
- Hang the ball in your tank and watch your turtle play!
Tips For Customizing Toys According To Your Turtle’S Needs
- Consider the size of your turtle when making the toy. A toy that is too big or too small can be dangerous for your pet.
- Think about your turtle’s personality and preferences when choosing materials for decorating the toy. Some turtles might prefer bright colors and shiny objects, while others might prefer natural materials like shells or sticks.
- Supervise your turtle when they are playing with the new toy, and remove it from the tank if you notice any signs of damage or wear and tear.
Making diy turtle dangling toys is an inexpensive and easy way to provide your pet with the stimulation and entertainment they need. By following these step-by-step instructions and customizing the toy to suit your turtle’s needs, you can create a toy that is both fun and safe.
Just remember to supervise your pet when they are playing with the toy, and remove it if you notice any damage or signs of wear and tear. Your pet turtle will thank you for it!
Turtle Climbing Ramp
Have you ever observed your turtle’s behavior closely? If you have, you might have noticed that turtles love to climb. Providing a turtle climbing ramp in their habitat can offer them a great deal of physical and mental stimulation. Here are some benefits of having a turtle climbing ramp:
Benefits Of Having A Turtle Climbing Ramp:
- Helps in turtle’s physical development
- Offers mental stimulation to turtles
- Encourages natural behavior
- Reduces stress and boredom
Materials required for making a turtle climbing ramp:
Making a climbing ramp for your turtle is an easy and inexpensive diy project. You will not require many materials. Here are some things that you will need:
- Plastic mesh or netting
- Zip-ties or duct tape
- Scissors
- Thin wooden boards or pvc pipe
- Aquarium-safe silicone adhesive
- Drill & screws
Step-by-step instructions for building a simple turtle climbing ramp:
Follow these simple steps to make a turtle climbing ramp:
- Take a mesh or netting material and cut it into the size of the ramp you want to make.
- Cut thin wooden boards or pvc pipes of the same size of the mesh.
- Secure the cut mesh on the wooden boards or pvc pipes with zip-ties or duct tape.
- Drill two small holes in each end of the boards or pipes.
- Attach screws into the holes, which will hold the ramp securely in place.
- Use the aquarium-safe silicone adhesive to stick the ramp on the back wall of the aquarium.
- Make sure to let the adhesive dry completely.
Tips for customizing a climbing ramp according to your turtle’s needs:
Each turtle has different needs. Here are some tips you can customize your turtle climbing ramp:
- Choose the appropriate size of the ramp according to your turtle’s size and its habitat.
- Place the ramp in a shaded area to avoid overheating.
- Provide a rough texture to the ramp surface, so the turtle can grip it easily and climb up and down without slipping.
- Keep the water level in the tank high enough to cover the ramp’s bottom, so the ramp doesn’t become too hot.
Making a turtle climbing ramp is an easy and affordable way to make your turtle’s habitat more enjoyable and comfortable. By providing a ramp, you can give your pet turtle more opportunities to climb, explore, and exercise.
Turtle Ramp For Water
If you’re a turtle owner, you know how essential it is to have a comfortable and safe environment for your pet. A water ramp can be an excellent addition to your turtle’s habitat, providing easy access in and out of the water.
Here are some helpful tips on why a water ramp is critical for your pet turtle, the materials required for making a turtle ramp for water, step-by-step instructions for building a basic turtle ramp for water, and tips for ensuring your water ramp is safe and comfortable.
Why A Water Ramp Is Critical For Your Pet Turtle
- A water ramp provides your turtle easy access to the water, reducing the risk of slipping and injury.
- Turtles can easily climb up and down the ramp’s gentle slope, making it easier for them to bask in the sun or enter the water.
- A water ramp helps your pet turtle to exercise and promotes healthy body movement.
Materials Required For Making A Turtle Ramp For Water
- A sturdy plastic crate or a plastic container with lid
- A piece of pvc pipe
- Aquarium sealant
- Silicone adhesive
- Stainless steel wire
- Scissors
- Sandpaper
Step-By-Step Instructions For Building A Basic Turtle Ramp For Water
- Cut the pvc pipe into pieces of a suitable length, which will work as support pillars for your ramp.
- Sand the support pillars’ edges using sandpaper, so they are smooth and safe for your turtle.
- Drill small holes on the plastic crate or container’s side to fix the support pillars.
- Place the support pillars vertically into the container and secure them with silicone adhesive.
- Cut a piece of wire and twist it around the support pillars to keep them in place.
- Cover the support pillars and container with aquarium sealant, so they are waterproof.
- Let the sealant dry, and then place the ramp in your pet turtle’s tank.
- Use sandpaper to make the ramp slip-resistant, so your turtle won’t fall off.
Tips For Ensuring Your Water Ramp Is Safe And Comfortable
- Always ensure that the ramp is stable and secured in your turtle’s tank to avoid toppling.
- The slope shouldn’t be too steep. Turtles have short legs and can’t climb steep surfaces.
- Your ramp’s surface should be slip-resistant, so your pet won’t slip and drown in the water.
- Clean the ramp regularly to ensure your pet’s hygiene and safety.
By following these simple steps, you can make a water ramp that helps your turtle’s healthy growth and movement while providing an environment that is both comfortable and safe.
Frequently Asked Questions On 10 Fun Diy Pet Turtle Projects You Can Make At Home
What Kind Of Diy Turtle Projects Can I Make At Home?
There are a variety of pet turtle projects you can make at home, including building a new enclosure, creating a basking area or hideaway, designing custom decorations for the tank, and even making a miniature pond within your turtle’s outdoor enclosure.
What Materials Do I Need For Diy Turtle Projects?
The materials you need will depend on the project you choose to do. For example, if you want to make a basking area, you’ll need a heat lamp and appropriate substrate. For custom decorations, you may need craft supplies like glue, paint, and various materials.
Is It Safe To Make Diy Projects For My Pet Turtle?
Yes, as long as you use safe, non-toxic materials and make sure to research best practices for any new addition to your turtle’s habitat. Do not use any materials that could pose a threat to your turtle’s health, such as certain types of wood or chemicals not meant for aquarium use.
How Much Will Diy Turtle Projects Cost Me?
The cost will vary depending on the project you choose and the materials you need. Some projects may be relatively inexpensive, while others may require a larger investment. However, making your own turtle projects can often be more cost-effective than buying pre-made items.
Do I Need Special Skills Or Tools To Make Diy Turtle Projects?
Many turtle projects can be completed with basic craft supplies and tools. However, depending on the project, you may need more specialized tools like saws or drills. Prior experience with diy projects can be helpful, but most projects can be completed with minimal experience.
Conclusion
From creating a turtle feeding station to constructing a basking dock, the possibilities for diy pet turtle projects are endless. Not only do these projects provide entertainment for owners and turtles alike, but they also offer a cost-effective way to enhance the overall living environment for beloved pets.
With a few simple and affordable materials, even those with minimal crafting experience can create a unique and personalized habitat for their shelled friends. Take the time to explore these ideas and see just how much fun you and your pet turtle can have with diy projects.
From natural-looking decor to functional structures, there is no shortage of ways to spruce up your turtle’s living quarters. So gather some supplies and get ready to create a one-of-a-kind space that is as fun and unique as your pet turtle.


Leave a Reply