To make a clay turtle, gather clay, shape the body, attach limbs, add details, and let dry. Creating a clay turtle is a fun and creative activity that can be enjoyed by both children and adults.
By following simple steps and using your imagination, you can bring your clay turtle to life. We will guide you through the process of making a clay turtle from start to finish. Whether you are a beginner or an experienced crafter, making a clay turtle can be a relaxing and satisfying project.
So, let’s dive in and explore the wonderful world of clay art together!
Gathering Supplies
When making a clay turtle, the first step is to gather all the necessary supplies. It’s important to have everything on hand before starting the project to ensure a smooth and enjoyable crafting experience.
Clay
Begin by selecting the type of clay you want to use for your turtle. There are various options available, including air-dry clay, polymer clay, or traditional pottery clay. Consider the color and texture you desire for your finished turtle when choosing the clay.
Modeling Tools
Next, gather the essential modeling tools. These may include sculpting tools, shaping tools, rolling pins, and cutting tools. These tools will help you mold and shape the clay to create the intricate details of the turtle.
Reference Images
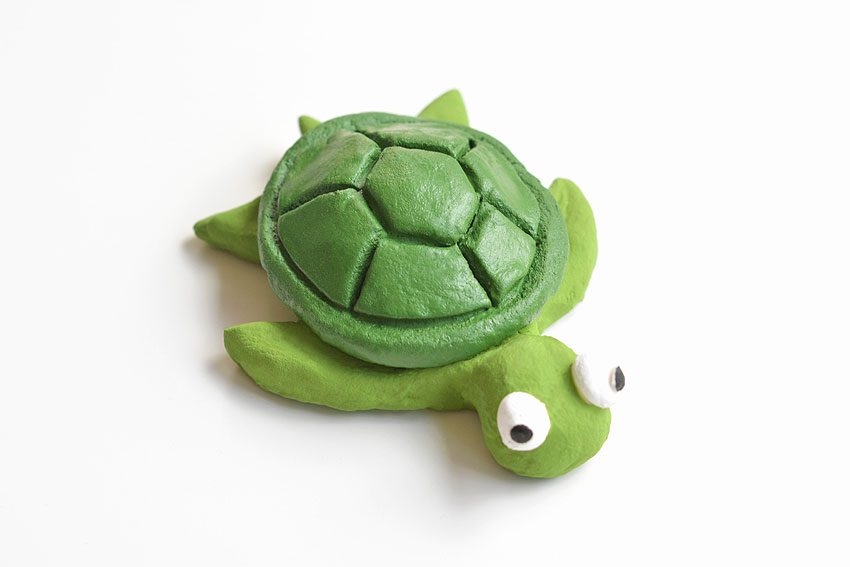
Reference images can be incredibly helpful when creating a clay turtle. Look for images of real turtles or artistic representations of turtles to use as a guide. These images can inspire your design and ensure that your clay turtle looks realistic and visually appealing.
Credit: feltmagnet.com
Preparing The Workspace
When making a clay turtle, preparing the workspace is crucial for a successful crafting session. This involves creating an organized and clean area where you can comfortably work on your project.
Covering The Surface
Cover your workspace with a plastic or vinyl tablecloth to protect it from clay and mess.
Organizing Tools
- Gather all the necessary tools like clay, sculpting tools, and a rolling pin.
- Place your tools in an orderly manner on a tray or in containers for easy access.
Creating The Turtle Body
Making a clay turtle can be a fun activity for both kids and adults. It is a great way to unleash your creativity and make something beautiful. Creating the turtle body requires some patience and attention to detail. In this section, we will cover the steps to form the turtle shell and shape the limbs.
Forming The Shell
To create the turtle shell, you will need a ball of clay. Start by flattening the ball with your palms. Then, use your fingers to shape the clay into a round shell. You can make the shell as big or small as you want, depending on the size of your turtle. Use a modeling tool to add texture to the shell, making it look more realistic. You can create lines or dots on the shell to give it a unique look.
Shaping The Limbs
Now it’s time to shape the limbs of the turtle. Take another ball of clay and divide it into four equal parts. Roll each part into a cylinder shape. Flatten one end of each cylinder to create the feet. Use a modeling tool to create the toes and claws. Attach the limbs to the bottom of the turtle shell by gently pressing them into place. Make sure they are securely attached so that they don’t fall off later.
Once you have formed the shell and limbs, you can add more details to your turtle. You can create eyes and a mouth using a modeling tool. You can also add patterns or designs to the shell using different colors of clay. The possibilities are endless!
Conclusion
Creating the turtle body is the first step in making a clay turtle. It requires some practice and patience, but the end result is worth it. Once you have mastered this step, you can move on to adding more details to your turtle and making it truly unique. Have fun and let your creativity soar!
Adding Details
When it comes to adding details to your clay turtle, it’s time to bring your creation to life. Adding small details and defining features will give your turtle its own unique personality. In this section, we will explore the steps to carve shell patterns and define features to make your clay turtle stand out.
Carving Shell Patterns
Carving intricate shell patterns on your clay turtle can add a touch of realism and character. Here’s how to do it:
- Use a small carving tool to carefully carve lines and patterns onto the turtle’s shell.
- Create a variety of patterns such as swirls, dots, or lines to mimic the natural texture of a turtle’s shell.
- Take your time and work slowly to ensure precision and avoid damaging the clay.
Defining Features
Defining features such as the eyes, mouth, and limbs can give your clay turtle a distinctive look. Follow these steps to define the features of your turtle:
- Use a smaller amount of clay to create the eyes and shape them into small spheres.
- Press the spheres gently onto the turtle’s head and use a tool to create indentations for the pupils.
- Add a small smile or expression to the turtle’s face using a sculpting tool.
- Shape the limbs and attach them to the body, ensuring they are securely connected.
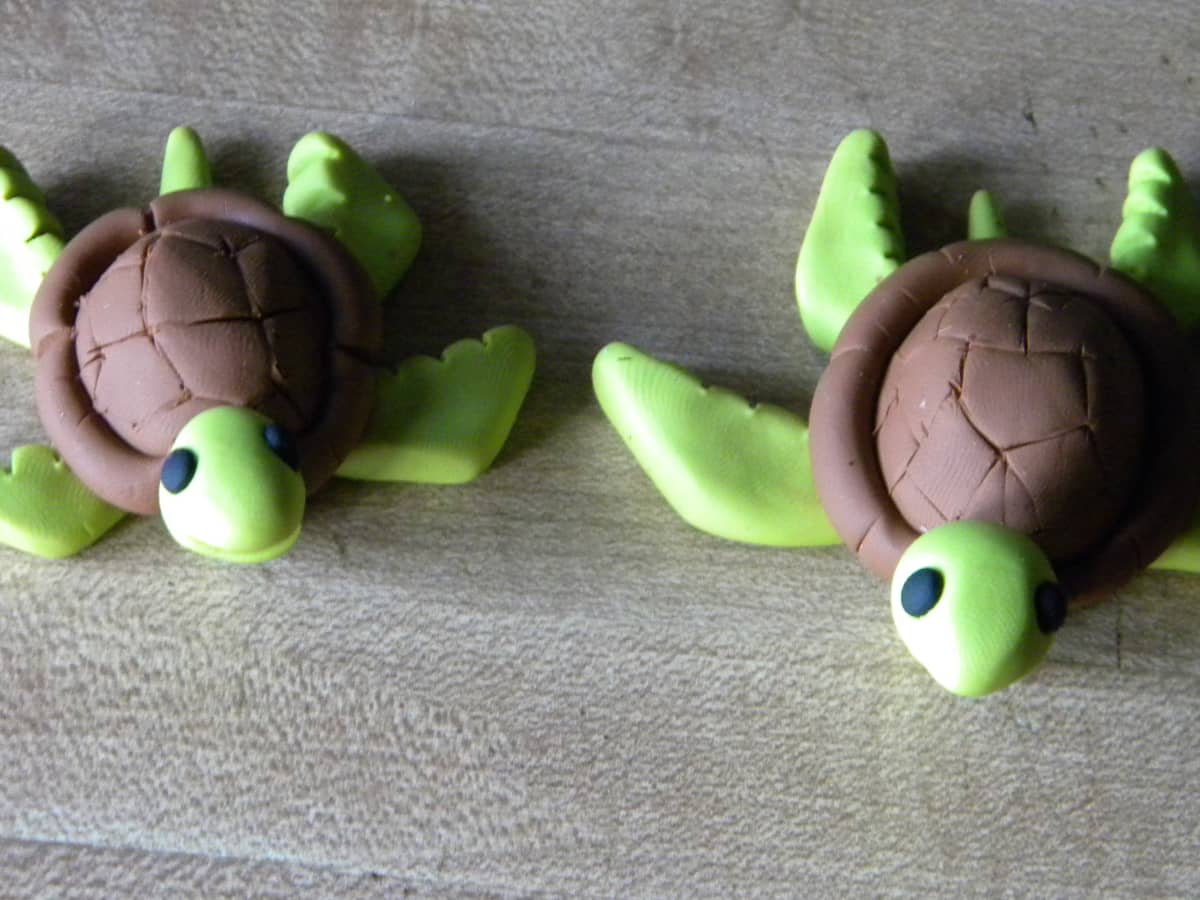
Refining The Sculpture
Refining the sculpture is an essential step in the process of making a clay turtle. This stage involves smoothing surfaces and checking proportions to ensure the sculpture looks polished and well-proportioned.
Smoothing Surfaces
Smooth surfaces are crucial for a refined clay turtle sculpture. Use fine-grit sandpaper or a clay modeling tool to gently smooth out any rough or uneven areas. Pay attention to the shell, limbs, and head, ensuring they have a sleek and uniform appearance.
Checking Proportions
Checking the proportions of the turtle sculpture is vital to maintain its realistic and aesthetically pleasing appearance. Compare the size of the head, limbs, and shell to ensure they are proportionate to each other. Make any necessary adjustments to achieve a balanced and harmonious look.

Credit: www.youtube.com
Drying And Firing
If you have made a clay turtle, now it’s time to dry and fire it. This step is crucial to ensure that your creation is strong and durable. The drying process removes the moisture from the clay, while firing hardens it. In this article, we will discuss two methods of drying and firing, air drying, and kiln firing, which you can choose depending on your resources.
Air Drying
Air drying is the simplest and the most inexpensive method of drying clay turtles. You can do it at home without any special equipment. Here’s how:
- Place your clay turtle in a dry and warm area that is out of direct sunlight.
- Let it dry for a few days until it feels firm to the touch.
- Turn it over and let the other side dry for another few days.
- Once your turtle is completely dry, you can sand it to remove any rough edges or bumps.
However, air-drying is not enough to harden the clay. You need to fire it to make it sturdy and durable.
Kiln Firing
Kiln firing is the most effective method of firing clay turtles. It requires special equipment, but the results are worth it. Here’s how:
- Preheat your kiln to the recommended temperature for your clay. This information can be found on the package or from the supplier.
- Place your clay turtle on a kiln shelf, making sure it is not touching any other object.
- Close the kiln door and let it fire for the recommended time.
- Once the firing is complete, let the kiln cool down before opening the door.
- Your turtle is now ready to be removed from the kiln.
Make sure to wear protective gear, such as gloves and goggles, while handling the kiln and hot objects. It’s also recommended to have a fire extinguisher nearby.
Whether you choose air drying or kiln firing, your clay turtle will look beautiful and last for years to come. So, get creative and have fun making your own unique turtle!
Painting And Finishing
Once your clay turtle is fully dried, it’s time to add color and protect your creation with a sealant. Here’s how to paint and finish your clay turtle:
Choosing Colors
For a vibrant touch, select bold colors that bring your clay turtle to life. Consider using acrylic paints for a smooth finish.
Applying Sealant
Protect your clay turtle from damage by applying a clear sealant. Brush the sealant evenly over the entire turtle and let it dry completely.

Credit: m.youtube.com
Displaying And Caring
When it comes to displaying and caring for your clay turtle, there are a few important considerations to keep in mind. Properly showcasing your creation and maintaining its appearance will ensure that it remains a beautiful and cherished piece of art. Let’s explore the key aspects of displaying and caring for your clay turtle.
Choosing A Base
When choosing a base for displaying your clay turtle, consider a sturdy and stable platform that complements the aesthetics of the sculpture. A wooden or glass display case can provide protection and visibility, while a decorative stand or shelf can enhance the overall presentation. Ensure that the base is large enough to accommodate the turtle without crowding it, allowing for an unobstructed view from all angles.
Maintenance Tips
Maintaining the beauty of your clay turtle involves simple yet essential care routines. Keep your turtle away from direct sunlight to prevent fading or discoloration, and dust it regularly with a soft, dry cloth to preserve its luster. Avoid using harsh chemicals or abrasive materials that may damage the clay surface. If your turtle is displayed outdoors, make sure it is sheltered from the elements to prevent weather-related wear and tear.
Conclusion
Crafting your own clay turtle is a fun and rewarding experience. Let your creativity shine with every sculpting session. Remember to enjoy the process and personalize your turtle with unique details. Share your masterpiece proudly with friends and family. Dive into the world of clay artistry today!


Leave a Reply